The ES API enables developers to harness the power of ES using an array of API methods. These allow you to automate, create and integrate into other applications. Here you will find information that will help you get started, along with some helpful guides to demonstrate the possibilities.
There are many different ways the API can be used within ES; Be it to receive data, for example, to automate job creation from an external MIS system. To push data to any other systems automatically at certain points of the workflow or to generate completely customised PDF reports.
You are able to develop front-end functionality, using plugin components, as well as back-end functionality using Step Scripts. Step Scripts enable you to create anything you can imagine in any back-end scripting language, e.g. Python, Bash...
These can then be integrated natively into ES, either as a manual action or as a step to execute in your workflow.
The ES API's main interface uses HTTP POST with the JSON-RPC protocol. JSON-RPC (JavaScript Object Notation Remote Procedure Call) is a way to communicate between a client and a server using the JSON format. JSON permits the description of Dictionaries, Arrays and basic types. A JSON dictionary is used to send commands or queries to the server.
For more information on JSON-RPC please refer to http://json-rpc.org
You can find more information and documentation for Plugin Components $here.
Requirements
- An ES system.
- The ES API License.
- A valid User with the required permissions for the specific call.
- Access to the API endpoint: <ES_URL> + /Esprit/public/Interface/rpc
Authentication
It is mandatory to be logged into the API to be able to execute any command or query. The command “admin.login” must be the first to be called. It is also very important to logout when the API is not required anymore for a particular user, as the licensing model of ES limits the number of users logged at the same time and the API consumes users the same way the graphical interface does.
The user credentials must be provided via Basic Authentication, using the associated users "login" field and password. This does not have to be done for every call sent, you can login and then store the valid JSESSIONID until you no longer need it.
See below for a Python example of logging in once, and reusing the session to send requests.
import requests
import json

# VARS
ES = "http://localhost:8080"
URL =  ES + "/Esprit/public/Interface/rpc"
USERNAME = "username"
PASSWORD = "password"

docID = sys.argv[1]
parentID = sys.argv[2]

def esLogin():
    JSON = {"id":"1","method":"admin.login"}
    rLogin = requests.post( url=URL, json=JSON, auth=(USERNAME,PASSWORD) )
    cookies = rLogin.cookies
    cc = cookies.get_dict()
    return cc

def esLogout(cookie):
    JSON = {"id":"1","method":"admin.logout"}
    rLogout = requests.post( url=URL, json=JSON, cookies=cookie )

def sendCall(JSON,cookie):
    rSendCall = requests.post(url = URL, json= JSON, cookies=cookie)
    callData = rSendCall.json()
    return callData[0]['result']

cookie = esLogin()

SETRELATION = [
 {
    "method": "relation.add",
    "id": "1",
    "params": {
        "sourceID": parentID,
        "targetID": docID,
        "description": "imageRendition",
        "type": "UserDefined"
    }
}
]

setDocRelation = sendCall(SETRELATION,cookie)
esLogout(cookie)
The cookie can be passed to any subsequent calls, however after a period of inactivity it will expire depending on the user's session timeout value.
API Calls
The ES API methods are split into 11 categories:
- Admin
- Customer
- Directory
- Document
- Folder
- Job
- Metadata
- Planning
- Production
- Relation
- Workflow
Each category of methods are logically grouped together based on what they interact with within ES. The majority of calls are POST requests, however there are some GET requests too - for example to GET a Documents thumbnail.
$ESURL + /Esprit/public/Interface/thumbnail/ + $ID
Each POST call is built with the following structure:
[
	{
    	"id"     : $ID
    	"method" : $category.$APIMethodName,
    	"params" : {
				$theParamDictionary
		}
	}
]
The basic response will be:
[
	{
		"method" : $APIMethodName,
		"id"	 : $ID,
		"result" : {
			$theResultDictionary
		},
		"error"	 : 	{
			"code" : "",
		    "message" : "",
		     "data" : {
			  }
		}
	}
]
If no error is encountered, the response will contain a result dictionary, otherwise you will receive an error code, a message, or a data dictionary within the error dictionary.
So for example, the method document.addNote with some of its optional parameters looks like:
[
 {
        "id": "1",
        "method": "document.addNote",
        "params": {
            "ID": "16498",
            "note": {
                "anchor.x": "70",
                "anchor.y": "350",
                "content": "This is a note",
                "positon.x": "100",
                "positon.y": "400"
            }
        }
  }
]
And a successful response would look like:
[
	{
		"method": "document.addNote",
		"id": "1",
    	"result": {
        	"noteID": 6603
        }
    }
]
Getting Started With Postman
The Postman collection provides you with a template for all of the ES API calls, as well as sample responses, and documentation all in one place. Postman allows you to execute the calls from within the application, giving you a chance to interact with ES and to help with any API developments you may be doing!
It is also a useful tool to start learning about the features of the ES API. You can set up Environments to quickly change the endpoint, for example this is extremely useful for swapping between a Dev/Production sever.
1) Download postman (if you do not have it) https://www.postman.com/downloads/
2) Import the collection:
File → Import → drag the collection attached into the postman interface:
Please fill out the following form to request our Postman collection.
3) You will need to set a Postman Environment, and define the following variables:
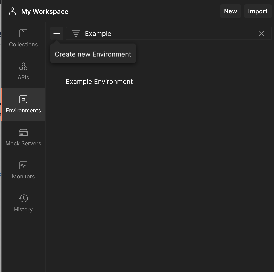
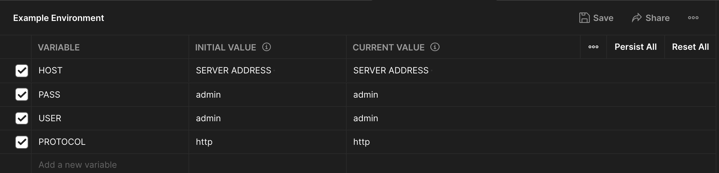
$USER: User to use from ES
$PASS: ES password for this user
$HOST: your ES server URL (including port if it is accessed in this way)
$PROTOCOL: HTTP/HTTPS
Do not forget to then set the active Environment
4) Once you have done this, you are ready to start sending calls!
Postman Interface
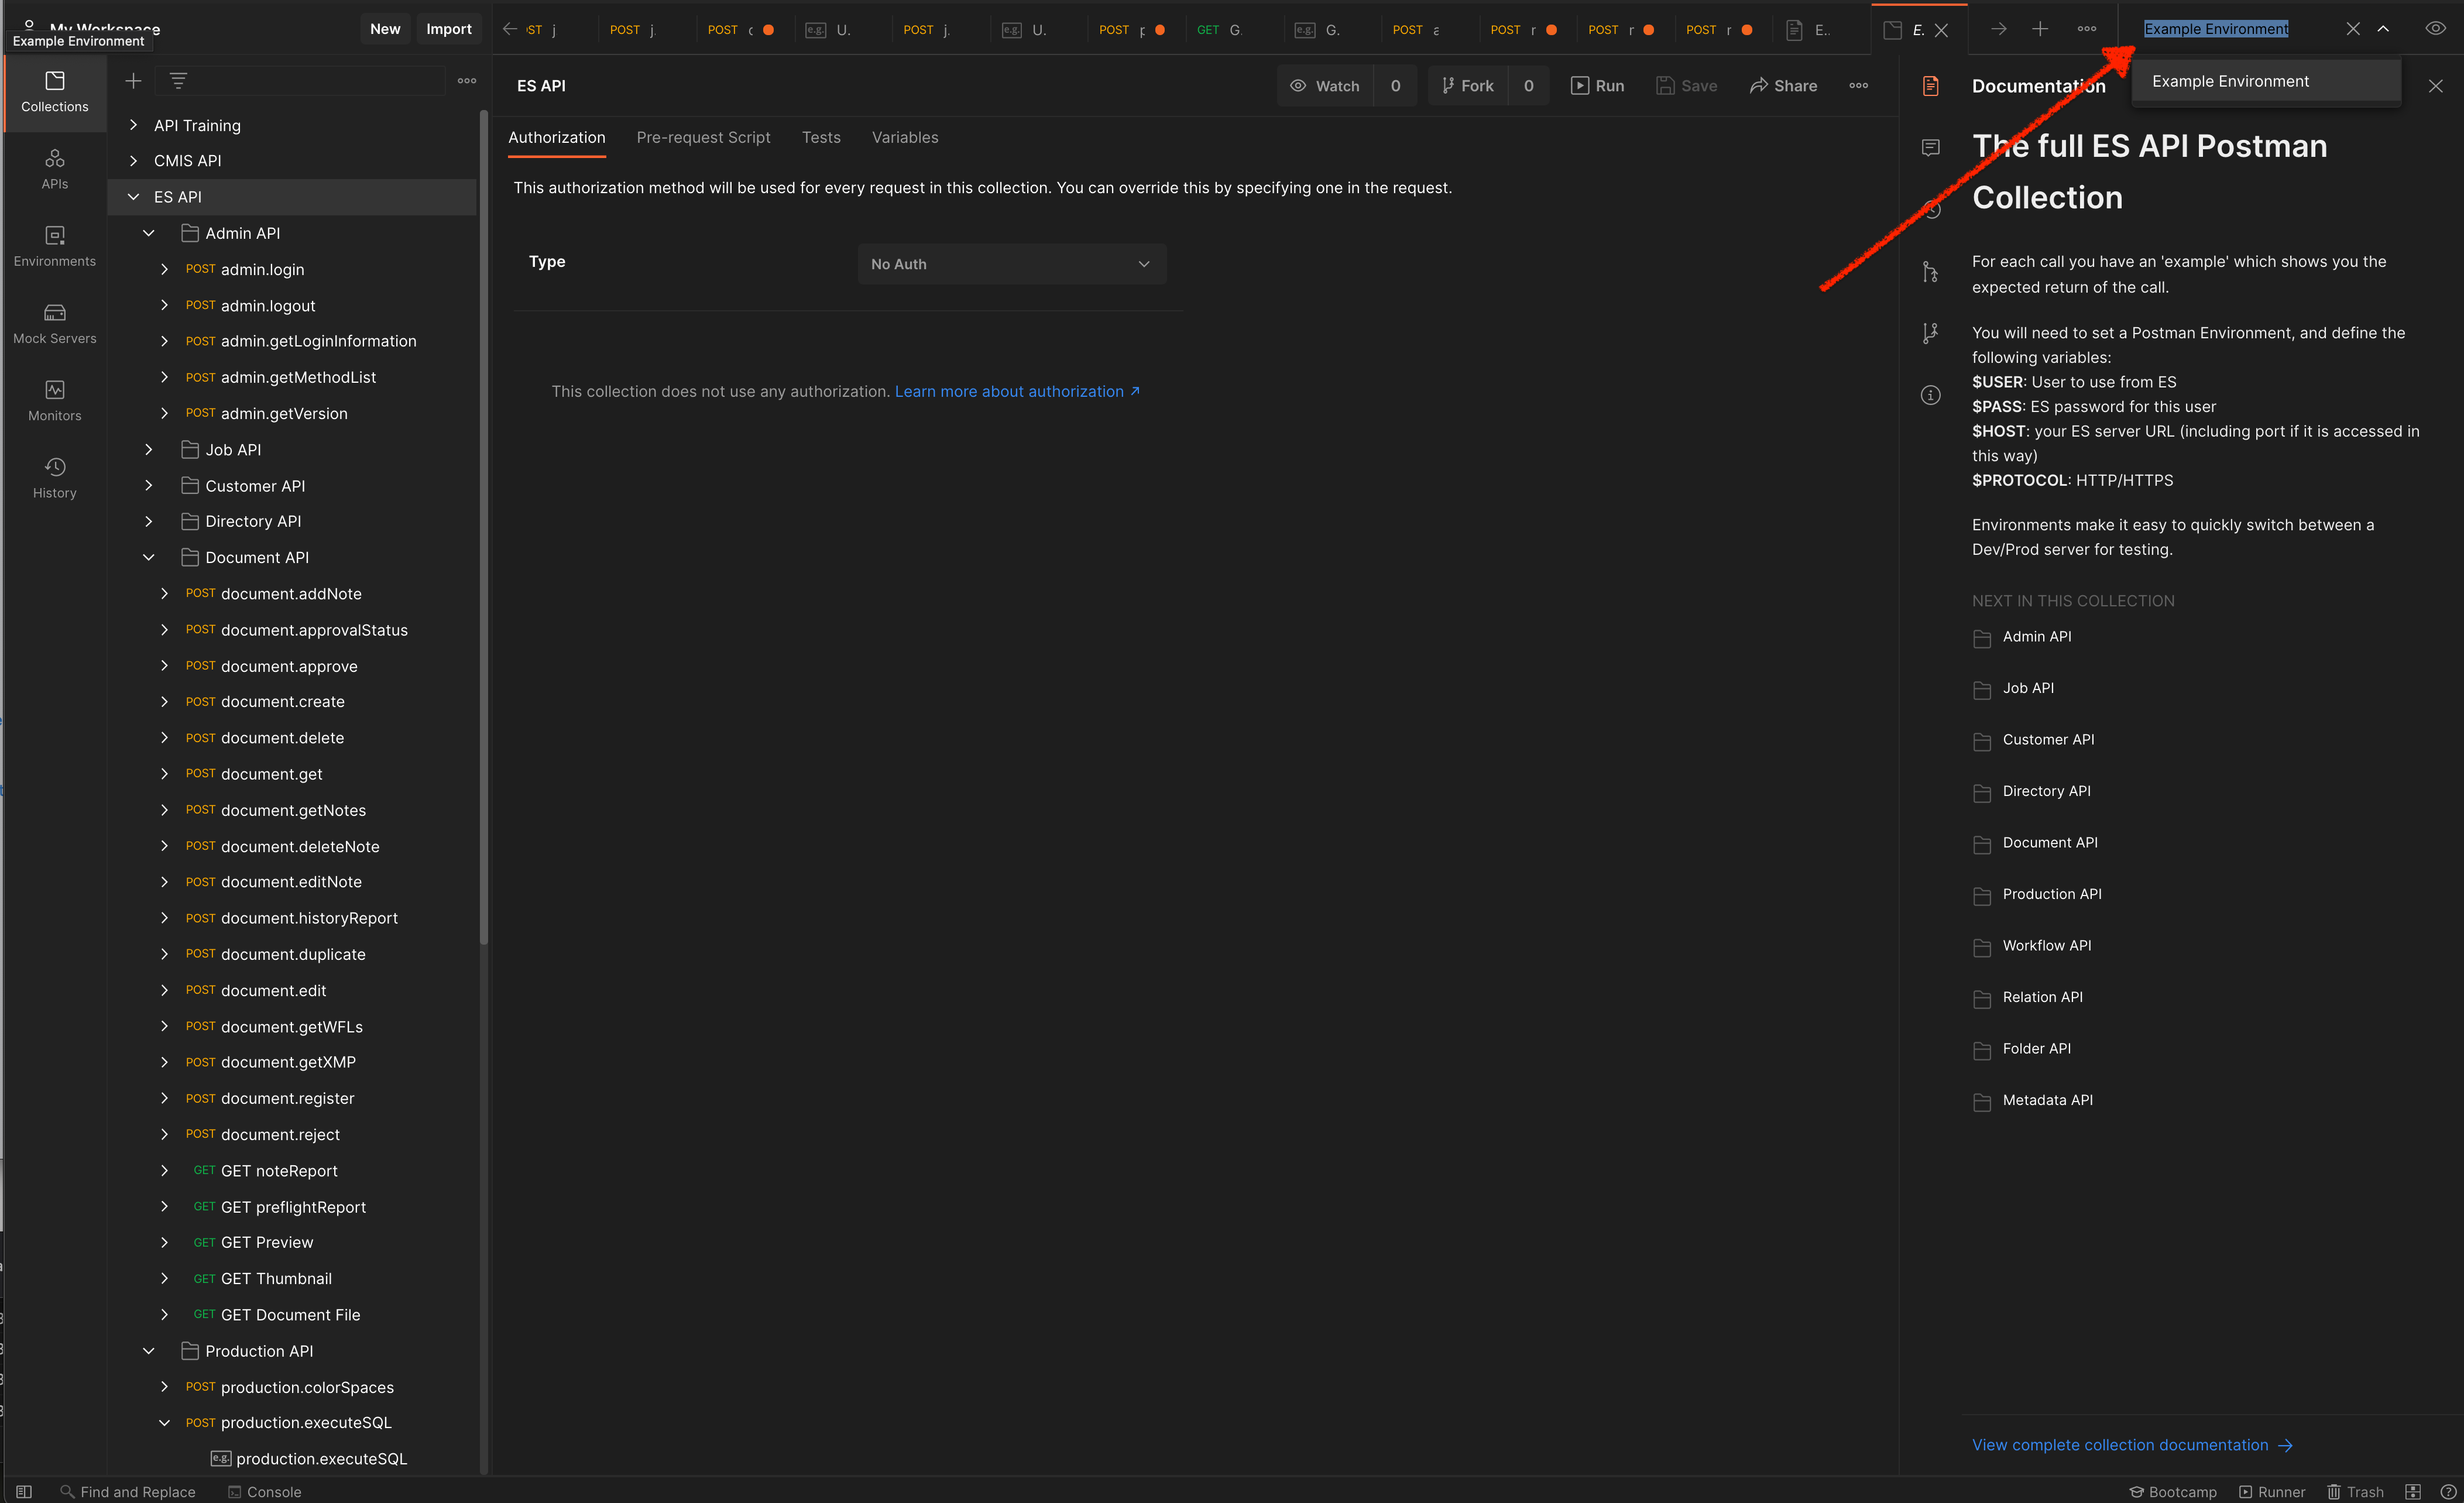
In the left hand panel, you have all of the ES API calls, if you expand the call, and click on the "Example" you will see what the call is expected to return. On the right hand side you can access the documentation directly in the panel. You can hover over a method/collection in the left hand panel → click the three dots → view documentation:
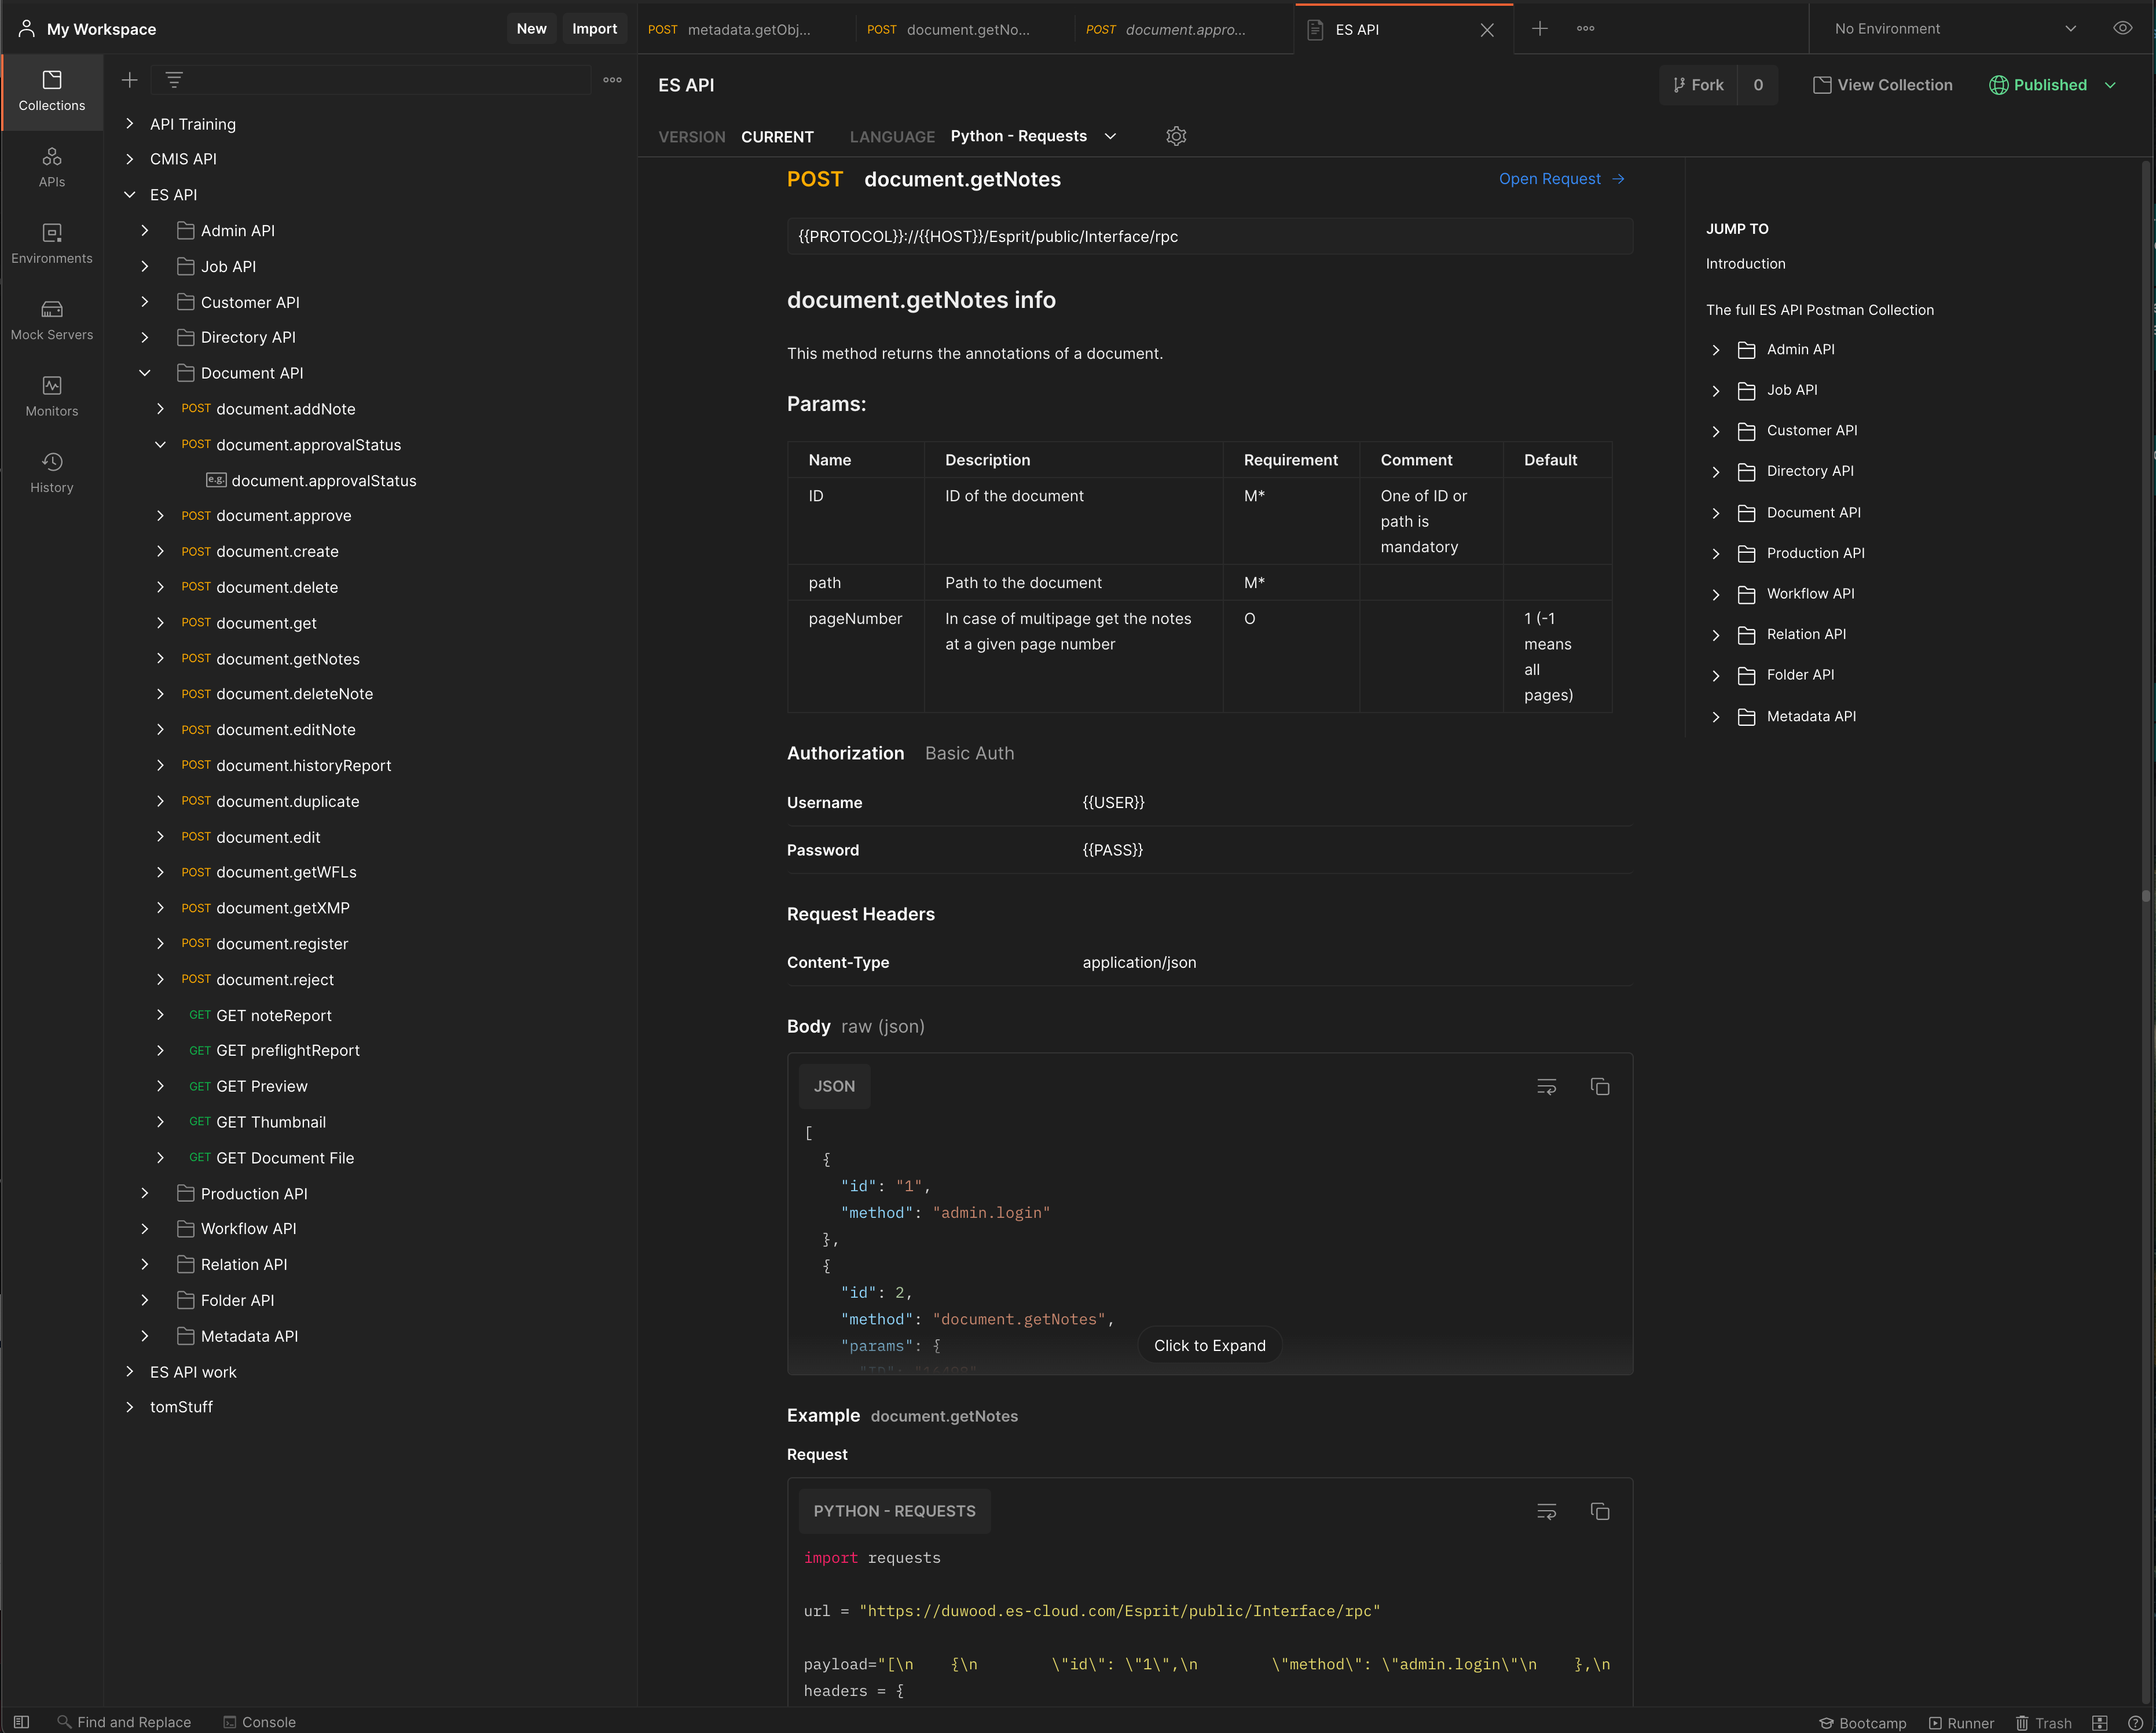
This will then open the documentation section. In the documentation you have all of the fields that can be given to the API call, the sample response, and a code snippet to send the request in a given programming language. In the folder structure on the right hand side, you can quickly jump to each methods full documentation.
Sample Scripts
Click here to download some sample scripts to help you get started with the ES API!